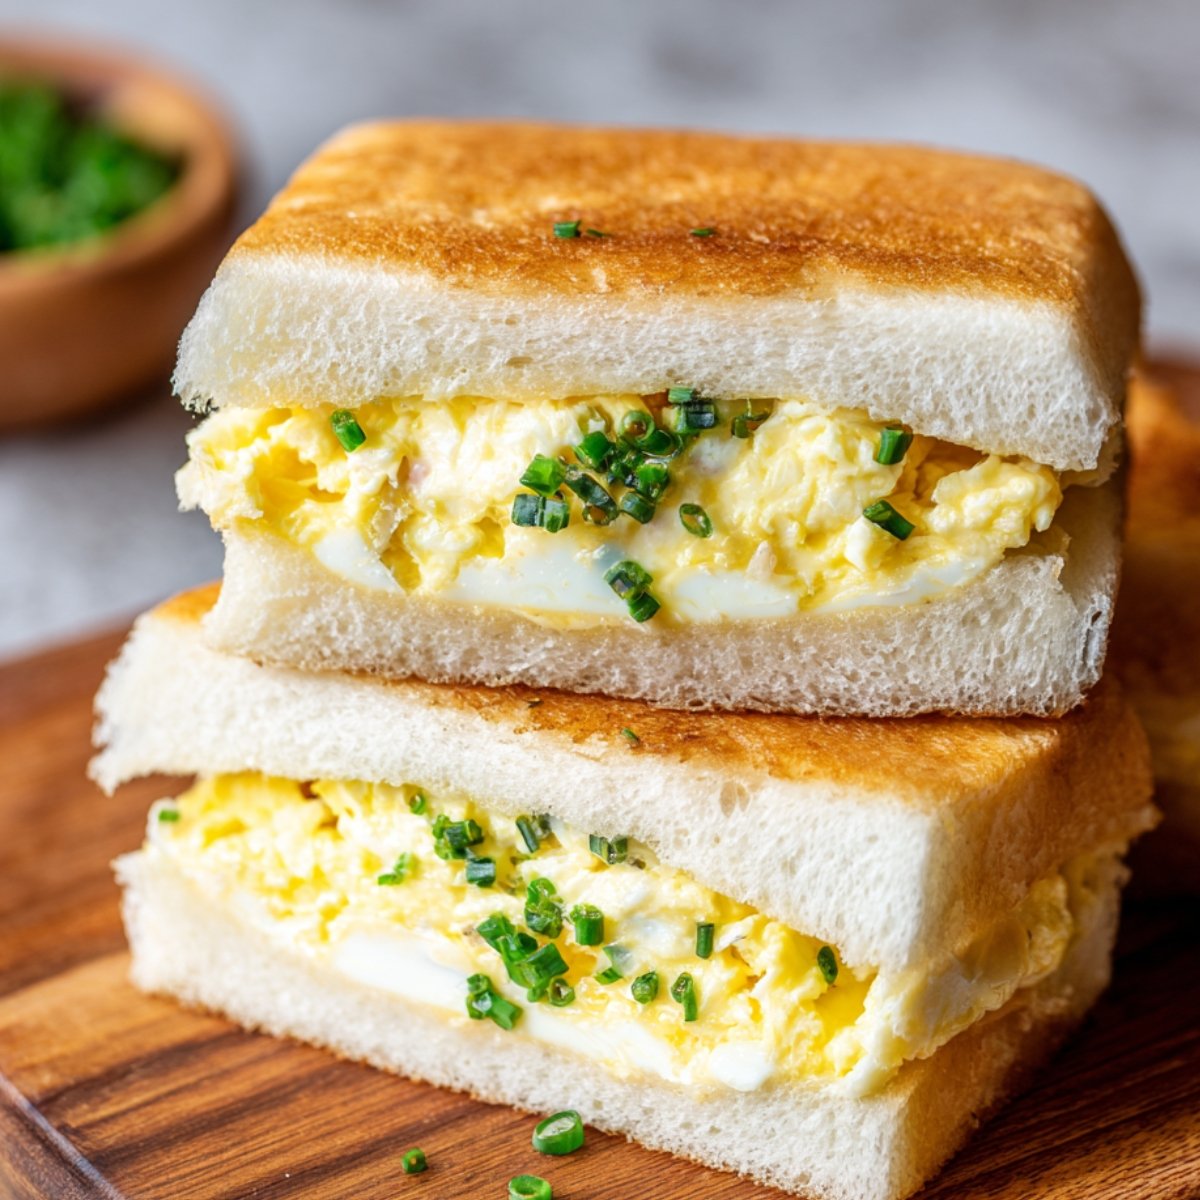
This Japanese Egg Sandwich is creamy, pillowy, and impossibly comforting, with soft shokupan bread and a luscious egg salad made with Kewpie mayo. I first tried one at a convenience store in Tokyo years ago and couldn't believe something so simple could taste that good. Now I make them at home whenever I want a quick lunch that feels special, and they're just as satisfying as the ones I remember.
If you love easy, cozy breakfast recipes like Baked Ham and Cheese Croissants or Apple Cheesecake Buns, this Japanese Egg Sandwich snack is going to become one of your new favorites. It comes together in under 25 minutes and tastes like you traveled halfway across the world for it.
Why You'll Love This Japanese Egg Sandwich
This tamago sando is one of those recipes that feels fancy but requires almost no effort. You probably have most of the ingredients already, and the whole thing comes together in about 24 minutes.
The Kewpie mayo is key. It's richer and tangier than regular mayo, with a subtle sweetness that makes the egg salad taste like something you'd get at a high-end Japanese Egg Sandwich café. If you can find shokupan bread (sometimes called Japanese milk bread), use it. The texture is softer and fluffier than regular sandwich bread, and it makes all the difference.
You also get two variations here, so you can pick the one that sounds better to you or make both and decide which is your favorite.
Jump to:
Japanese Egg Sandwich Ingredients
Here's what you'll need for both versions of this incredible sandwich.
See Recipe Card Below This Post For Ingredient Quantities
Classic Egg Sandwich
- Large eggs: The star of the show. Hard-boiled, then separated into yolks and whites for the creamiest texture.
- Kewpie mayonnaise: This Japanese Egg Sandwich mayo is richer and tangier than American mayo, with a hint of sweetness. It's what makes the Japanese Egg Sandwich salad taste so special.
- Sugar: Adds a subtle sweetness that balances the richness and brings out the other flavors.
- Ketchup, optional: A tiny bit of ketchup adds a hint of tang and a pale pink color. It's traditional in some versions.
- Nutmeg, optional: Adds warmth and a little complexity. You won't taste it directly, but it makes the egg salad feel more rounded.
- MSG, optional: Boosts the savory flavor. If you don't have it or don't want to use it, no worries.
- Salt: Enhances all the other flavors and keeps the Japanese Egg Sandwich salad from tasting flat.
- Freshly cracked black pepper: Adds a little kick and depth.
- Shokupan : This ultra-soft Japanese milk bread is key. If you can't find it, use the softest white bread you can get.
- Butter, for spreading: Adds richness and helps the sandwich hold together.
Soft Boiled Egg Sandwich
- Large eggs: Two get soft-boiled for that gorgeous, jammy yolk center. The other two get hard-boiled for the egg salad base.
- Kewpie mayonnaise: Same magic ingredient, slightly more to accommodate the extra eggs.
- Sugar: Balances the richness.
- Ketchup, optional: Adds a hint of tang and color.
- Nutmeg, optional: Subtle warmth.
- MSG, optional: Savory boost.
- Salt: Brings everything together.
- Freshly cracked black pepper: A touch of spice.
- Shokupan : Thicker slices work better for the soft-boiled version since you need to hold those jammy eggs in place.
- Butter, for spreading: Rich and essential.
How To Make Japanese Egg Sandwich
Let me walk you through both versions so you can pick your favorite.
- Boil the eggs: Place the eggs in a pot and cover them with cold water. Bring to a boil over medium-high heat, then reduce to a simmer and cook for 10 to 12 minutes for hard-boiled eggs. Transfer them immediately to an ice water bath to stop the cooking. Once cool, peel the eggs gently.
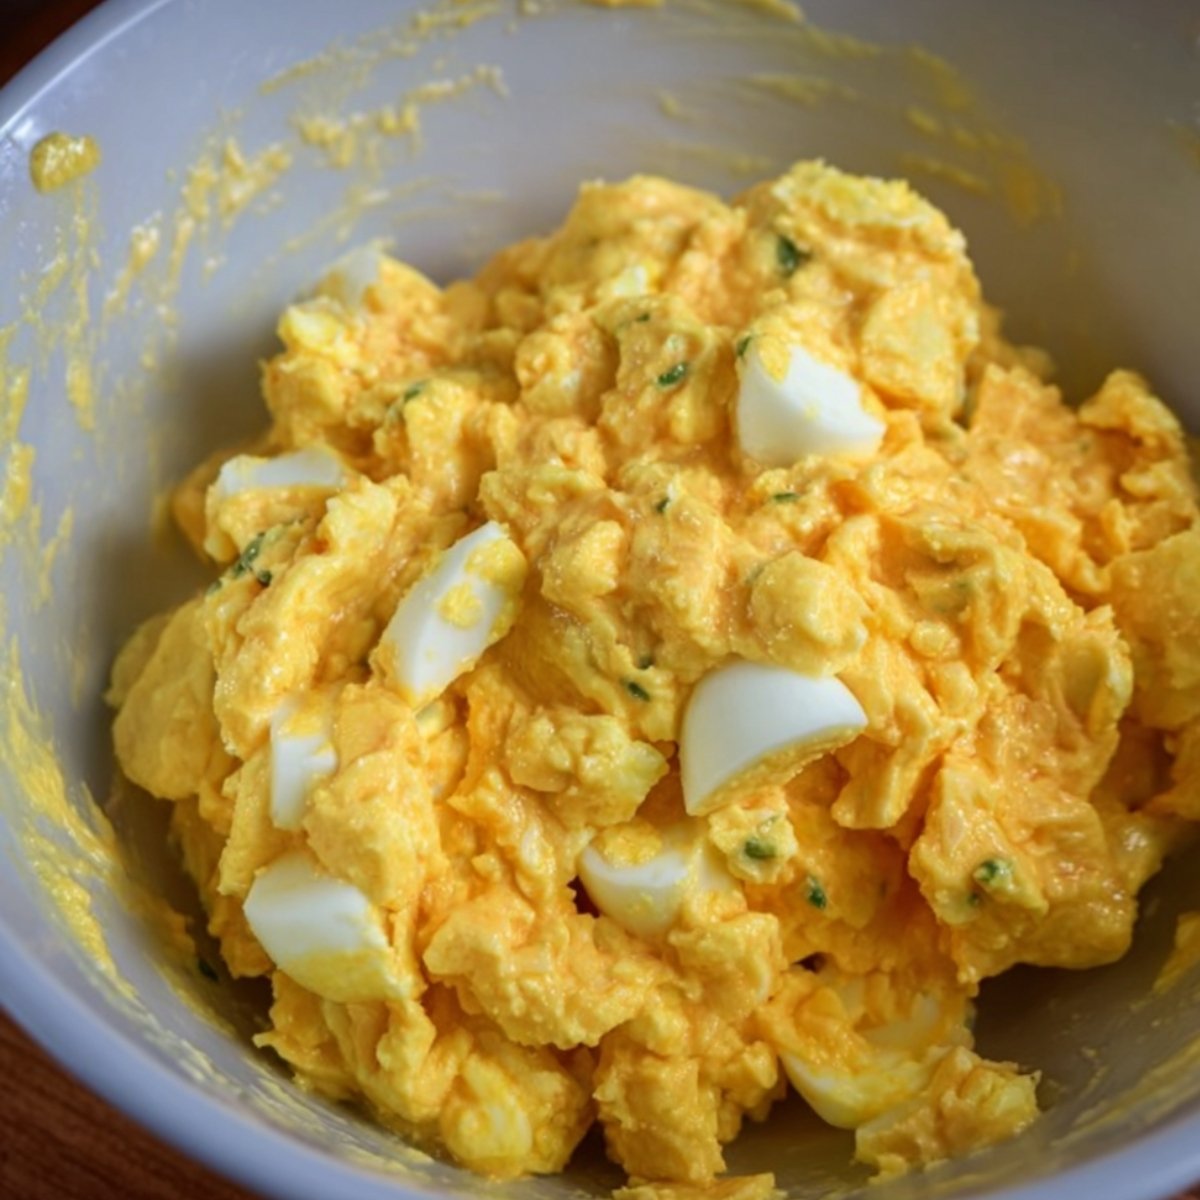
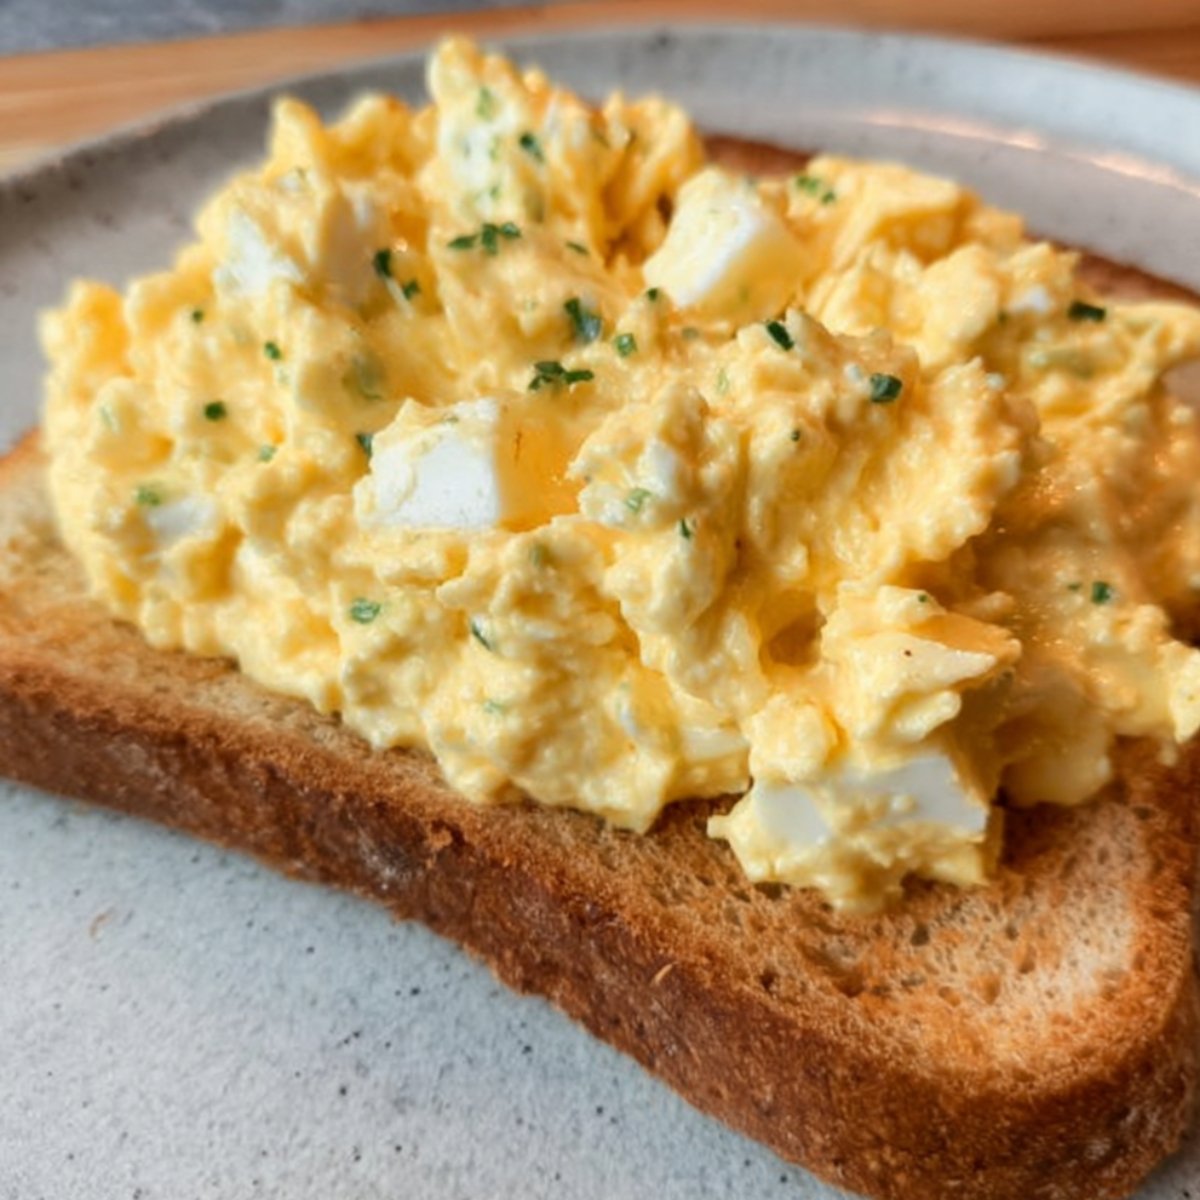
- Prepare the egg salad: Separate the yolks from the whites. Put the yolks in a bowl and mash them with a fork until they're crumbly. Add the Kewpie mayo, sugar, ketchup if using, nutmeg, MSG, salt, and pepper. Mix until smooth and creamy. Finely chop the whites into small pieces and fold them into the yolk mixture. You want some texture from the whites, but everything should be well combined.
- Assemble the sandwich: Use a sharp knife to carefully cut the crusts off both slices of bread. Spread a thin layer of butter on one side of each slice. Spread the egg salad generously on top of the buttered side of one slice, mounding it slightly more in the center so you get a nice cross-section when you cut it. Place the second slice on top, buttered side down.
- Wrap and rest: Wrap the sandwich tightly in plastic wrap, pressing gently to help everything settle together. Let it rest at room temperature for 5 minutes. This helps the flavors meld and makes the sandwich easier to slice cleanly.
- Slice and serve: Unwrap the sandwich and use a sharp knife to cut it in half diagonally or straight down the middle. The filling should stay put and look beautiful. Serve immediately and enjoy every creamy, fluffy bite.
- Cook the eggs: Bring a pot of water to a boil. Gently lower 2 eggs into the boiling water and cook for exactly 6 to 7 minutes for soft-boiled eggs with jammy yolks. At the same time, cook the remaining 2 eggs for 10 to 12 minutes for hard-boiled. Transfer all eggs to an ice water bath, then peel them carefully.
- Make the egg salad: Separate the yolks and whites from the hard-boiled eggs only. Mash the yolks with Kewpie mayo, sugar, ketchup, nutmeg, MSG, salt, and pepper until smooth and creamy. Chop the whites finely and fold them into the mixture.
- Assemble: Keep the crusts on for this version since the thicker bread helps hold the soft-boiled eggs in place. Spread butter on one side of each slice. Add a generous layer of egg salad to one slice, concentrating more in the center. Place the two soft-boiled eggs horizontally in the middle of the sandwich. Spoon more egg salad around and on top of the eggs to cushion them and hold them in place. Top with the second slice of bread, buttered side down.
- Wrap and rest: Wrap the sandwich tightly in parchment paper, making sure the seam runs perpendicular to where you'll cut so the eggs get sliced in half when you cut through. Place a light plate on top of the wrapped sandwich and let it rest for 5 minutes. This helps everything compress slightly and hold its shape.
- Slice and serve: Use a very sharp knife to slice through the center, right through the middle of the soft-boiled eggs. You should see that gorgeous golden yolk oozing out slightly. Serve immediately while the yolk is still jammy.
Smart Substitutions
No Kewpie mayo? Regular mayo works, but add a tiny bit of rice vinegar and a pinch of extra sugar to mimic the tang and sweetness of Kewpie.
Can't find shokupan? Use the softest white bread or brioche you can find. Potato bread also works well.
Don't like ketchup? Skip it. The sandwich is still delicious without it.
Want it vegetarian? This recipe is already vegetarian, but if you're looking for a vegan version, you'll need to use a plant-based mayo and skip the Japanese Egg Sandwich entirely, which changes the recipe completely.
EQUIPMENT
- Pot for boiling Japanese Egg Sandwich
- Ice water bath (just a bowl filled with ice and cold water)
- Sharp knife for chopping and slicing
- Plastic wrap or parchment paper
- Butter knife or small spatula
- Spoon for spreading egg salad
- Fork for mashing yolks
How to Store Leftovers
These sandwiches are best eaten fresh, but if you need to store them, wrap them tightly in plastic wrap and keep them in the fridge for up to 1 day. The bread will lose some of its fluffiness, but the flavor will still be great.
For meal prep, you can make the egg salad ahead and store it in an airtight container for 2 to 3 days. Assemble the sandwiches right before eating for the best texture.
Don't freeze these. The texture of the eggs and bread doesn't hold up well after freezing.
Serving Suggestions
Serve your Japanese egg sandwich with a small side salad dressed in a light sesame or ginger vinaigrette. The crisp greens balance the richness of the egg salad.
Pair it with a cup of green tea or a cold glass of iced barley tea for an authentic Japanese Egg Sandwich snack experience.
You could also serve it alongside miso soup and pickled vegetables for a light Japanese Egg Sandwich-style lunch.
Cut the sandwich into smaller pieces and serve it as part of a bento box with fruit, edamame, and maybe a rice ball.
Expert Tips
Use fresh eggs. Fresher eggs are harder to peel, so if you have eggs that are a week or two old, they'll peel more cleanly after boiling.
Ice bath is essential. Plunging the eggs into ice water immediately after cooking stops the cooking process and prevents that greenish ring around the yolk.
Mash the yolks thoroughly. You want them completely smooth before adding the mayo so the egg salad is creamy, not lumpy.
Use a sharp knife. A dull knife will squish the bread and make the filling ooze out. A sharp knife gives you clean, beautiful slices.
Don't skip the resting time. Letting the sandwich sit for 5 minutes helps everything settle and makes it easier to cut without everything sliding around.
Adjust seasoning to taste. Some people like a little more salt, some want extra pepper. Taste your egg salad before assembling and adjust.
FAQ
What's in Japanese egg sandwiches?
A traditional tamago sando contains hard-boiled eggs mixed with Kewpie mayo, a touch of sugar, salt, and pepper, all sandwiched between ultra-soft shokupan bread. Some versions add ketchup, mustard, or soft-boiled eggs for extra richness. My family loves the classic version best, though the soft-boiled one is definitely a showstopper.
Why is Japanese egg sandwich so good?
It all comes down to the quality of the ingredients and the technique. The shokupan bread is incredibly soft and slightly sweet, the Kewpie mayo is richer and tangier than regular mayo, and separating the yolks from the whites creates the creamiest texture. Everything is perfectly balanced, and the sandwich is so carefully assembled that every bite feels luxurious.
How do you make a fluffy egg Japanese Egg Sandwich in Japan?
The secret is using shokupan (Japanese milk bread), which is naturally fluffy and soft. You also separate the egg yolks and whites, mash the yolks with mayo for creaminess, then fold in finely chopped whites for texture. Wrapping the sandwich and letting it rest helps everything meld together, and using a sharp knife to slice keeps it from getting squished.
Is tamagoyaki just Japanese Egg Sandwich?
Tamagoyaki is a Japanese Egg Sandwich rolled omelet made with eggs, dashi, soy sauce, and a bit of sugar. It's different from the egg salad in tamago sando. Tamagoyaki is usually served as a side dish or in sushi, while tamago sando uses hard-boiled or soft-boiled eggs mixed with mayo. Both are delicious, but they're totally different preparations.
Related
Looking for other recipes like this? Try these:


Pairing
These are my favorite dishes to serve with Japanese Egg Sandwich


Japanese Egg Sandwich
Ingredients
Method
- Boil the eggs until hard-boiled, cool them in ice water, and peel.
- Separate the yolks from the whites. Mash the yolks with mayo, sugar, ketchup, nutmeg, MSG, salt, and pepper until smooth. Chop the whites finely and fold them into the yolk mixture.
- Remove the crusts from the bread. Butter one side of each slice. Spread the egg salad generously on one slice, focusing on the center for a nice cross-section.
- Wrap the sandwich in plastic wrap tightly and let it rest for 5 minutes.
- Slice the sandwich in half with a very sharp knife and serve immediately.
- Soft boil 2 eggs and hard boil the other 2 eggs. Chill in ice water, then peel.
- Separate the yolks from the hard-boiled eggs. Mash the yolks with Kewpie mayo, sugar, ketchup, nutmeg, MSG, salt, and pepper until smooth. Finely chop the whites and fold them into the yolk mixture.
- Leave the crusts on the bread. Butter one side of each slice. Add a generous amount of egg salad to one slice. Place the 2 soft-boiled eggs horizontally in the middle, then spoon more egg salad between and around the eggs to hold them in place.
- Wrap the sandwich in parchment paper tightly, ensuring the eggs will be sliced in half when cut. Rest for 5 minutes under a light plate to help hold the shape.
- Slice through the middle (the tallest part) for a beautiful cross-section and serve immediately.
Leave a Reply